Pages

background

Followers

Thursday, 10 June 2010

Entrance

Today I'm sharing another of the layouts from my fortnightly class at Scrapbook Sisters

This is the second layout I have finished from class two of three using the K&Co Poppy Seed Pad, plus other add ons.

This is another photo from SIL's wedding and is of her and my HB (who gave her away).  I love this photo of the two of them, they both look so happy :-)

I think I prefer this LO to yesterdays - it's still got a lot going on but is cleaner and simpler.  I love the colour combinations here and the use of white space is really effective.  Maybe it's because the photo is in black and white that it looks more classy than if I'd of used a colour one like on yesterdays - maybe I should swap yesterdays pic for the same one in B&W... hmm...

The scrolled frame is cut out using one of those plastic template thingys, and I've trimmed the photo to a 4 x 4 inch square then matted it on more white cardstock to make it pop out from the background.

The title is stamped with Woodware Alphabet stamps


I'd never made these fan flowers before, but they were really easy, but they really made my arms ache with all that folding.  I've used a Papermania felt brad in the middle of each.

I've hand cut the leaves and chalked them a touch, then punched flowers using the EK Success retro punch.  The middle of each flower is from the reverse of the same paper as the retro flower, but using a mini Woodware flower punch.  There is a black diamond gem in the middle of each flower. I domed the flowers and leaves slightly in my hand with a round pen cap, and have stuck them onto the page with foam pads to give them a bit of a lift.


One thing I used the flowers for was to cover up things in the photo that I didn't want to be seen - right at the top of the photo was a fire exit sign.  I couldn't crop it out without cutting HB head off (although that is very tempting on occasion ;-)... ), so I've stuck a flower over it - and it's gone!!

Thanks for stopping by

Sue
xx

Wednesday, 9 June 2010

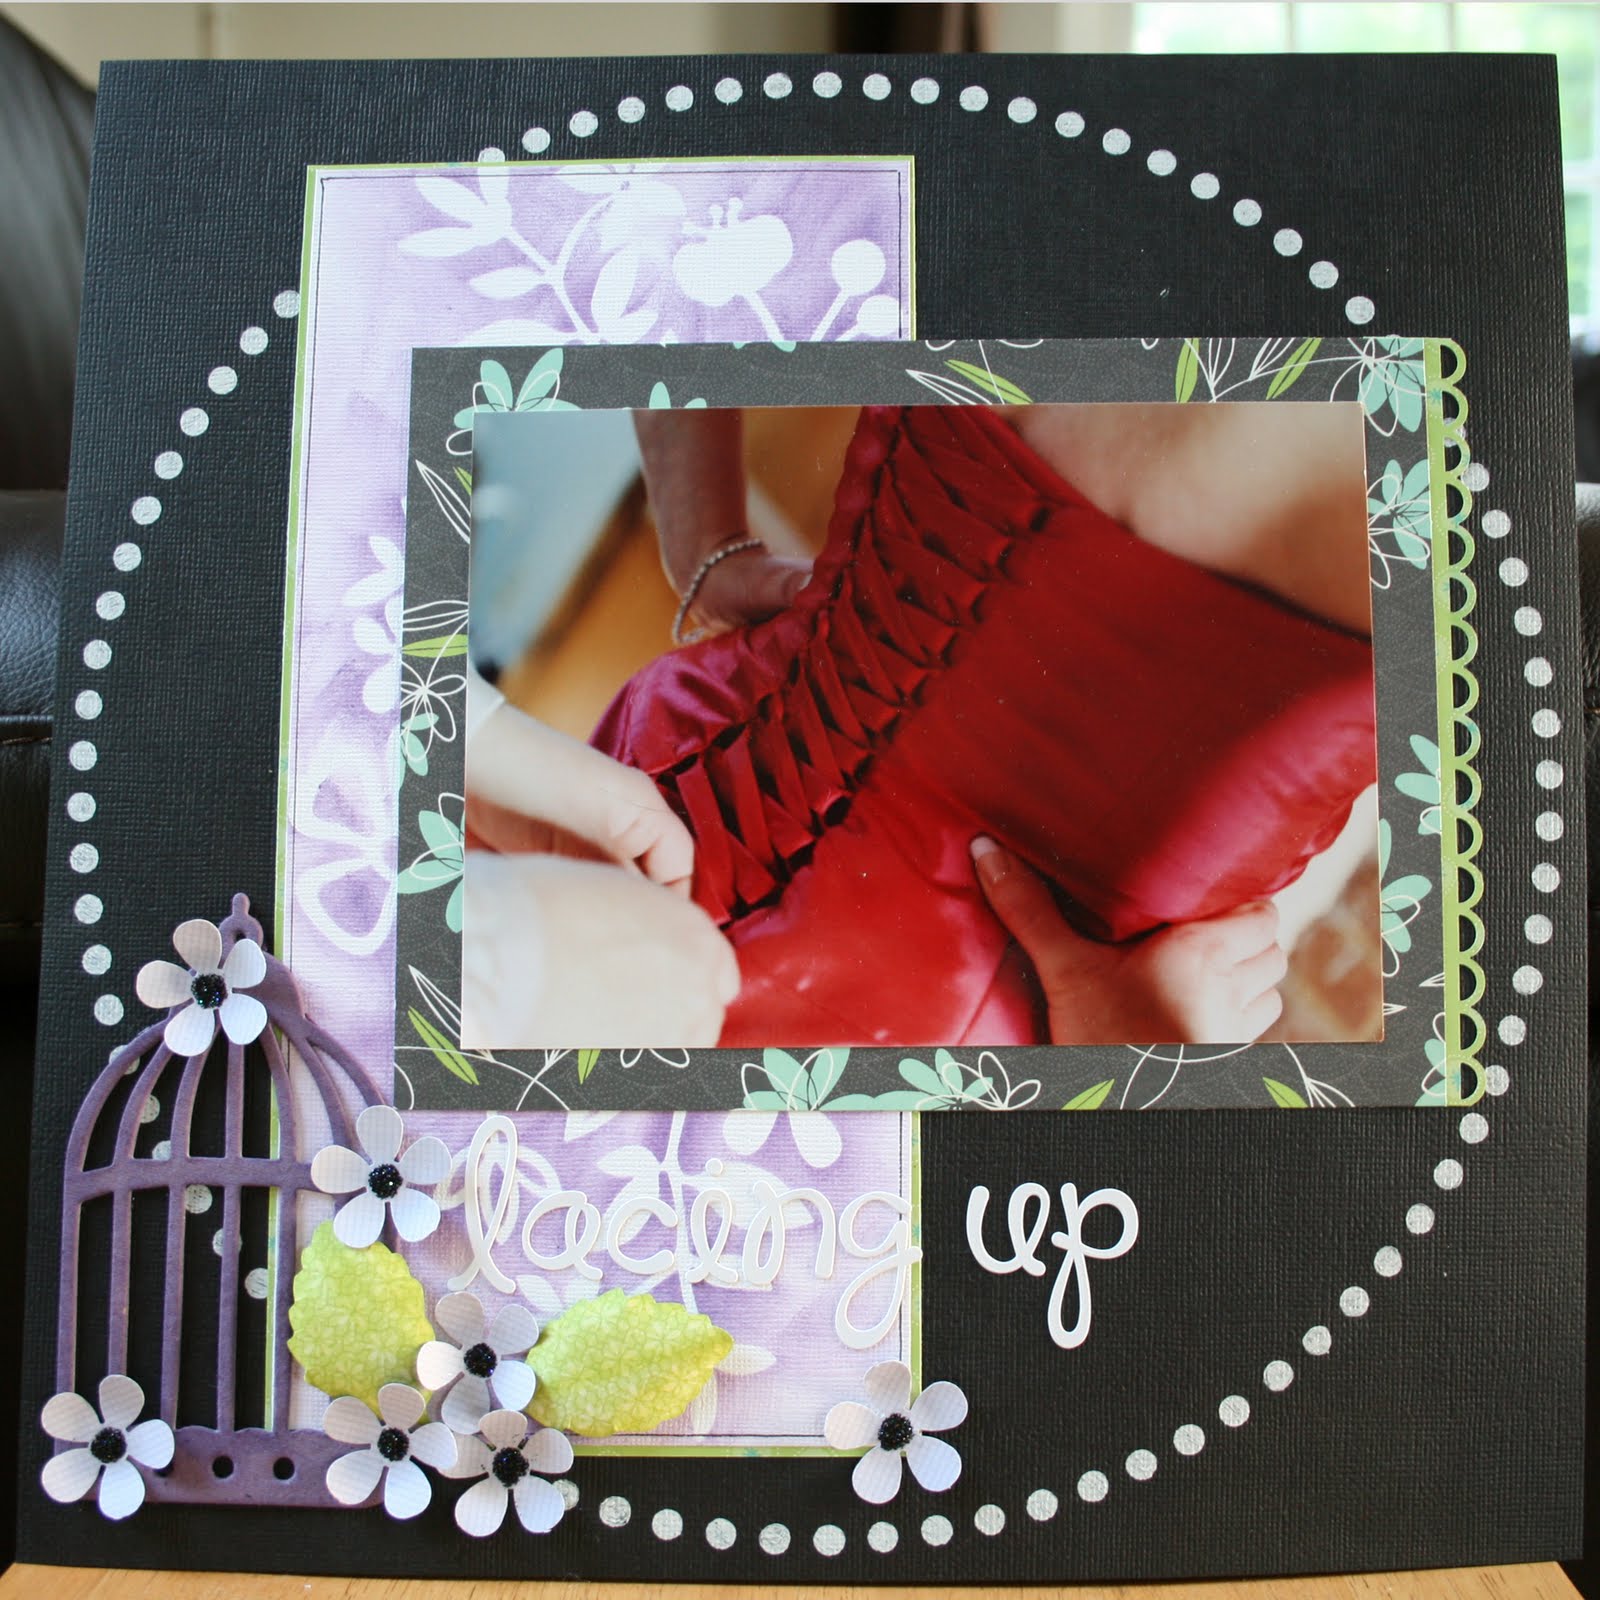
Lacing Up...

Evening!!

Tonight I'm sharing one of the layouts I started last week at my regular scrapping class at Scrapbook Sisters - I've been very good and completed two of them already - think I need a little lie down now :-)

As usual there was a selection of layouts that Karen and Julie had done as ideas which we could either lift directly or use as inspiration

I like these layouts, although this one is quite detailed and has more on it than I would have put on had I not been using the class as inspiration. 

The photo is of the back of the bridesmaids dress I wore to my SIL's wedding - I'm going to add a bit of journalling to the page to explain the why, when and how a bit later once I've figured out what to put. 

If it wasn't such a fiddle (and a bit uncomfortable) I'd wear tops like this all the time - for once I had a waist and a cleavage LOL!


We used a Heidi Swap mask to create the reverse purple flower pattern along with Distress Ink.  I'd never used one of these masks before, and to be honest I found it a bit of a fiddle - but that was probably me not doing it right - it looks OK but with hindsight I think should have used one of the other papers in the pack instead.  Having said that that's half of the point of going to the classes as you try things out and find out what you like and what you don't (the other half is meeting friends and having a giggle, LOL).  I know loads of people have these and love them, but I don't think they're for me.

I used black Stickles in the centre of the flowers for a bit of subtle bling, and the title (which isn't showing up very well in the main photo) are are alphabet stickers as I still haven't got round to getting a new cutting mat for my Cricut

I LOVE the birdcage on this layout though - this was included in the class kit - I am really tempted to add some butterflies to it though - don't know why or even if it would make it all too cluttered... I may have a play later and see what I think :-)


I can't wait to see what the third and final class in this set of three is - but I've got to wait until next Tuesday!!  How am I going to cope!!

Supplies - Black and White Bazzill cardstock; K & Co Poppy Seed Pad; Chipboard Birdcage - part of kit, cut on Cricut (I think); White Pen; Black Pen;  Dotty Circle Template; Heidi Swapp mask; Distress Ink; EK Success Border, Retro Flower and Leaf Punches; Black Diamond Stickles; Doodlebug Loopy Lou white Alphabet Stickers

Thanks for looking

Sue

Tuesday, 8 June 2010

Busy day

Hi!  I've had a pretty busy day today - all work though, just a little play tagged onto the end of the day :-)

My youngest had a massive temper tantrum in the supermarket, and in the car, and once he got home - I think he'd got over tired and it was all too much - so I had the lurkings of a headache once I sat down myself!

So I haven't done much crafting tonight, I just finished a layout from last weeks class.  I'll have to wait for better light for photos of it though as I've just tried taking them and they look rubbish!

Hopefully tomorrow I'll have pics to share

Sue xx

Monday, 7 June 2010

A little bit of sewing...


Seeing as I had the sewing machine out at the weekend making the sun visors for the mini got me thinking about taking the plunge and sewing on a card.

I've seen it done on lots of images on blogs and in magazines but despite owning a machine haven't dragged it out to give it a go... until now :-)

As I'd already coloured up another bride image I decided to do another wedding card, using the same papers as before.  Again I've used a sketch from Friday Sketchers - these sketches are lovely, but quite heavy on paper use!

The sketch I used this time was number 94


And this is the card I made with it


You can't really see the stitching in the photo's but I promise it's there!  I don't think it's too bad for a first attempt, but I think I need to keep the needle I used for card only as I reckon it'll get blunt very quickly!

I used a lovely metallic silver machine embroidery silk for the stitching - I wasn't too sure if it would be OK and if regular cotton would be better, but it seemed to work fine.

The only problem is I now need more room if I'm going to make a regular thing of sewing on cards as there is no space on my already overflowing desk!

Supplies: Stamp - Bride Nikki coloured in Copics, Pink Gems, Prima and Woodware Flowers, Papermania Brads, Pins and Beads, Bo Bunny Love Shack and Double Dot papers

Thanks for looking

Sue xx

Sunday, 6 June 2010

Little Miss Muffet

Hi, hope you've had a great weekend!

It's been really hot and humid here for most of it, yesterday was unbearable - so little breeze, but we fired up the BBQ and had dinner outside which was great.  Today we went to a friends little boys birthday.  The kids really enjoyed themselves and it was really good to catch up with friends again as we've not seen them in ages.  Hopefully now the weather is improving we'll get together more often :-)

It was one of my other friend's little girl's birthday the other week, but we weren't able to go to her party so I took along her present and card today as well, so that seems a good one to share tonight.

Its another easel card - sorry for the lack of imagination, but they are really eye catching and everyone who has received one has loved them!


The image is Little Miss Muffet Digi Stamp by Mo Manning, which I have coloured with copics and cut out with a deckled nestability die, then gone round the edge with Antique Linen.  She looks so similar to my friend's daughter - Mo really has a knack of drawing kids!


The papers I've used for this one are from Bo Bunny Anna Sophia Shabby Plaid and Worn dots, which I think worked well with the colours off my Little Miss!

More tomorrow, thanks for looking

Sue
xx


Saturday, 5 June 2010

Still crafty, but completely different :-)

As some of you may know my HB has been restoring a classic Mini for the last 6 months or so.  I've more or less been on child minding duties while he's been in the garage tinkering, but I have been roped in to sorting the interior

This was scary as I've never done upholstering of any kind before, let alone on a car!

When the car arrived it was black and white, but had previously been blue - check out those blue velour seats!!  They have worked really hard and are doing a really good job and it's nearly there - the engine is pretty much the last thing to go in and that should be in the next week or two, and the wheels are off being stripped and redone (whatever it is that they do to wheels :-) )


I can't find the pics of how it looked when it first arrived, but by the time this one was taken, most of the paint had been removed, panels were cut out and replaced as needed (and there were quite a few that needed!)


Then followed gallons of Waxoyl to help prevent the rust ever coming back, litres of underseal and seven (!!) coats of primer before they packed her up as it was too cold for a couple of months for them to be in the garage. 

In early March she went off to be sprayed...


Since she came back they have been busy putting her back together - parcels of bits have been arriving more or less daily and I've stopped asking about the budget :-)  Honestly, for such a small car there are is an incredible amount of components :-). Most of them are new if the originals could not be reconditioned.  It's been a bit of a family thing, with HB, BIL and FIL doing the bodywork, my Dad doing the engine and gearbox. 

It's odd, but the number of people that have fond memories of these little cars, you can see why they are an such an icon!

So.. a few sneak peek pics of how she's shaping up


Ooh, my contribution of the day???

Well the top and bottom rails of the dash have been covered in suede, the middle is carbon fibre stuff - the holes are going to have more dials and a stereo in them, and a she's getting a new steering wheel, when we can agree on which one we like :-)


The headlining is now some lovely black fabric as opposed to the original 1980's vinyl, but no point taking a picture of that as it just looks like I've left the lens cap on :-)

Here are the sun visors I stripped back to the frames and re-foamed and  re-covered in the same suede used on the dash - I'm chuffed with these!!  (should have brushed the nap before taking the picture though!).  I know we could have bought some on eBay, but they are so expensive, and weren't what we wanted so I stuck to the custom route and made them myself.   They were actually pretty easy to do... if you don't count stiching the tops up by hand that is :-)


I've also covered the rear bins and rear wheel arches with the suede too... we had a set of black seats in storage already, but I'm hankering to make some suede and black leather seats seeing as how well what I've done so far, maybe not for this one...

I'll share a pic of her once she's all finished...

I'm thinking about doing a mini book (no pun intended!) to record the project - probably should do two as she will be going up for sale more or less on completion to make room for the next one (!!) and I think it would be nice to give something to the new owners.  I'm kinda resigned to the fact that we'll probably lose money on this one, but as only 6% of all the old mini's ever made are still on the roads then maybe it's preserving a piece of motoring history, and it makes HB happy in the same way my crafting does, so I can't grumble too much!

Sorry it is a bit alternative tonight, but making these visors was as near to crafting as it got today :-)

Thanks for looking

Sue xx

Friday, 4 June 2010

Finally! Wedding Card!!

Finally I am able to share the pictures of the wedding card that I have made for my colleague in the Netherlands. 

We found out that although she isn't having any bridesmaids the colours of her flowers are red, pink and orange so I used that as my starting point.

I think this is one of my favourite cards ever!


I hope you like it too :-)

The papers are quite busy, but I think they work well together for this card - probably because the image is quite simple colour wise- not sure they would work with an image that had more colour in it??  Anyway, seeing as the bride is Dutch I think it's appropriate orange is one of the main colours ;-)


Those pins have come out to play again - this time I kept them neutral though.  I know you can buy ready made ones but they're quite easy to make and look really effective too.


I love the flowers on this card - this is the first time I've used small flowers like these ones, but love them - they are so different!


Supplies:
White Cardstock - Papermill; Orange Cardstock - Bazzill;
Papers - Love Shack "Baby", "Shimmy"and "Party" all Bo Bunny;
Orange Flowers - Woodware; Pink Flowers - Prima;
Stamps - Bride Nikki stamped with Memento Tuxedo onto Gina K Luxury cardstock and coloured with Copics, and Glamour Dust on her sleeves. 
Edge of the image stamped with stamps by Studio G, Series 11, stamped with pink Chalk Eye
Brads - Papermania;
Pins and Beads - Dunelm Mill; 
"Love" charm - from stash

To get it there safely I'm going to make a box for it and we're putting it in a padded envelope too!
Thanks for looking - have a great weekend

Sue xx

Thursday, 3 June 2010

My card is done and is one of my favourites EVER!

But I can't show it to you yet!! Noooo!!!

We had a bit of a disaster on the camera front today - HB borrowed my camera for work but left the memory card at work (yes he appreciates the enormity of his error :-)   ) so I was unable to take any pictures :-(

I'm truly gutted as I was so chuffed with it - if you didn't read yesterday's post I was making a card for a colleague in the Netherlands who is getting married for our office to sign and send over to her.  I was really worried about the colours but they worked just fine - you'll just have to trust me on that until tomorrow!

In fact by happy coincidence the photos I'm showing tonight are of a scrapbook page with similar colours - pink and orange!

This page was done in my regular class at  Scrapbook Sisters and uses some stunning papers by My Mind's Eye - it's becoming a close run thing between Bo Bunny Papers and My Mind's Eye at the moment!

The pics are (for a change) of my youngest son taken at my SIL's wedding - the photo's are those that were taken in the early evening by my SIL's photographer Ken Peachey.


I'm so sorry that my pic of the page is so awful!!  We'd changed him into a different shirt for the evening - his waistcoat and cravat were hired and I couldn't cope with the stress of an 18 month old boy with a white waistcoat and cravat!  Looking again at this pic, perhaps I was a bit over optimistic on sizing as those shirt sleeves look far too long!

Loving his cheeky grin,and fascination at a light you could turn on and off by just touching the base!

Incidentally SIL's wedding was held at Elvey Farm - a stunning collection of rooms in the heart of Kent -a fab restaurant too - highly recommended.   Oooh, and it's in Pluckley too, which is supposed to be the most haunted village in the UK (I didn't spot anything spooky, but that meay have been the vast quantities of wine consumed, LOL)

Until tomorrow and those missing photo's!

Sue xx

Wednesday, 2 June 2010

School Picture and a busy evening!

I've got a busy evening ahead of me.  I need to make a special wedding card for one of my colleagues in the Netherlands.  I'm going to use some of my my Bo Bunny Love Shack papers which until now I have been stroking - they are quite bright but her colours are pink red and orange so I think I can get away with it!

I've asked one of my other Dutch colleagues to email me a sentiment in Dutch... I'm only hoping that they are friends and she doesn't tell me something rude or cheeky :-)

I'm also going to use my new Bride Nikki stamp, and I've got some lace lurking somewhere, plus pins, flowers and other bits and bobs that are wedding related :-)

... I've got to have it all finished by Monday so I can take it into work and we will all sign it and send it over in time for her big day... I'll share how I get on!!

I had a great time at last nights class and got a good start on a few pages - I decided to concentrate on doing the things that I can't do at home, so now have a bag of bits ready to be finished off at home, but I'm really pleased with how I got on, I just need to find the time to do them now.

I don't know about you but I swing between doing scrapbooking and doing cards - sometimes I like one more than the other!  I think at the moment I'm really enjoying the cards though - maybe it's because there are so many great new products and some of the digi images that are now available mean that I can increase the variety of what I can do without too much cost (or having to smuggle yet another bag past HB!)... maybe giving myself a break from the pressure of the school fete has made it enjoyable again rather than a chore who knows!

After all that tonight's photos are another school picture.  I have to say that I didn't really like this photo - it failed completely to capture my son - it's too posed!  Having said that it's still the best photo he's had since starting school - but still not a patch on the one he had done at nursery, which you can see here.


Odd how when you don't like a photo that much the layout doesn't really flow :-(, the main thing I like on this page are the pencils which I made by cutting up strips of coloured card and adding lines and a bit of card at the top cut with pinking shears to make them look like they've been through a pencil sharpener.  They open up to reveal hidden journalling.

Thanks for stopping by

Sue xx

Tuesday, 1 June 2010

Think it's safe to show you this now :-)

I've been itching to share the last class layouts for the last two weeks, but as the class repeats for two weeks I haven't dared as I didn't want to spoil it for anyone still to go :-)

As I'm due to go to part two of three tonight I think I'm fairly safe to start sharing...

OK, so this was a new departure for me since I've been going to my regular class at Scrapbook Sisters... we were given a K & Co Poppy Seeds Pad and some White Bazzill and a pack of chipboard stickers...

Now, when I first saw these papers, card images started floating before my eyes, but I had my scrapbooking head on, so had to be strong!

Julie and Karen had created several sample layouts as inspiration, and I decided to follow the double layout.  I don't know why but I really like double layouts, maybe because you can tell the whole story, get more photos on, maybe because when you are flipping through an album a double page makes it more like a book rather than a random series of images...

whatever... I love 'em :-)

This is my take on it, and it showcases several photo's I took while on holiday in Paris with my Mum and Dad.  I think about 1984???


I don't know why but these layouts scream holidays to me... they're not traditional holiday colours, so maybe I just need a break!

The leaves are punched using the one of the new EK Success Punches - if you haven't seen them they close flat and are stackable - why someone hasn't thought of this before I've no idea!  The leaves have then been rubbed with Moss Distress Ink to tone down them down a bit as the green was a bit too bright


Tonight we have been asked to take back any unused papers (although we have the rest of the pack still left over), plus the chipboard.. can't wait for what is awaiting us :-)

Thanks for stopping by

Sue xx


Monday, 31 May 2010

Perfection = 1 Mug, 1 Sofa, 1 box of chocs, 1 Fluffy Dressing Gown

Thanks to the long weekend I've been able to play more than usual, and have been adding to the box of cards at a fairly rapid rate...

...why???? well....  I've decided to take the plunge and do a (very) local farmers market in the middle of the month - assuming they'll have me, and the cost of the stall isn't too much...

This is why I've been creating in batches of two's and upwards for a few weeks.  As some of you know for the last three years I've been selling my my cards at the school fete and giving them 100% of the takings.

I think that in the last year my designs have become more intricate, more complicated, and as such more expensive and time consuming for me to make, and making the 150 cards plus that I need to sell at the fete would just take too long seeing as it's in 3 weeks! (and yes, the thought that I knew it was coming up and should have started sooner has occurred to me!)

 In the last three years I have given the school around £1000 and taken not a bean.  While rewarding it was so disheartening at times - we were selling handmade cards for £1 and some people were still sniffy about it.  I couldn't figure it out - they had the opportunity to purchase a unique card for one pound, all of which went to support their child's school fund, yet still they would rather go to the card shop, tesco's or wherever and buy something mass produced and pay 2, 3 or 4 times the price... go figure :-).   So, as I say I'm starting small and doing the local market... now I live in a very small community so I'm not expecting a lot, but it's only for a few hours... if I sell anything I'll be happy :-) 

So this explains the mass production... please don't blame me for doing more than one of each design, I could blame my corporate training, but it's actually more to do with the fact that I don't actually like to give things away and want to keep one of each for myself :-)

 So anyway, enough drivel from me... onto today's card...


Putting pins on a card are a first for me, but I LOVE them!!!!  


I got a big packet of the plain pins from Dunelm Mill for £2.49 and the beads cost 99p each for a pack of 25/30.  I will admit to getting a bit carried away and buying some beads that were FAR to big for cardmaking, but in my defence they were very pretty :-)

Slobbing Nikki  has been coloured using Copics


The basic layout is from the Friday Sketchers Blog, which is a great source of inspiration.

Supplies:
Cardstock: White Linen Card - Papermill; Verde - Bazzill
Papers: Bo Bunny Mulberry Dot, Jazmyne Mist and Jazmyne Terrace
Punch: Martha Stewart
Flowers: Prima
Brads: Papermania
Stamps: Slobbing Nikki and Sentiment, Ladybug Crafts Ink
Pins and Beads - Dunelm Mill

Thanks for looking

Sue xx


Sunday, 30 May 2010

Playing with Acetate

Now I don't think I'm the only crafter in the world who has a pile of stuff they buy with good intentions then use a bit but don't really know what else to do with it!

So I read the article on using acetate in issue 16 of Creative Cardmaking with interest as I have loads of the stuff but seem to struggle to find new ways to use it!  One design particularly caught my eye so I've lifted it :)


It's much more effective IRL than my limited photography skills allow :-).

Basically there is an acetate panel in the middle of the front of the card and then there is a strip of cardstock stuck to the right hand edge.  I've neatened the back up by putting strips of card over the acetate.  The image is stuck onto the acetate with foam pads and I've stuck another plain label on the back to hide them.   The happy birthday sentiment is stamped on the back panel of the card.

Supplies: Bazzill Bling, Acetate, Bo Bunny Papers and Ribbon, Stamps - Winestool Nikki and Happy Birthday

I've also been playing with my new stamps, and as I had loads of paper left over from yesterdays Jill cards used them up to make cards with this image of Daydreaming Ruby


Isn't she cute!  I've used Glamour Dust on her wings to give her a bit of sparkle.  I can see her being used on quite a few cards soon!

Anyway, that's it from me today, I've got to go to the supermarket and then keep the washing machine loaded... I'm still ignoring the ironing!

Thanks for looking

Sue xx

Saturday, 29 May 2010

Introducing Jill...

As I hoped I've had a little bit of me time today to play, so took the opportunity to use the "Jill is Two" image that I recently got from Mo Manning


Isn't she a sweetie?  I think anyone that has or knows a little girl has seen that expression more than once!  :-)

I liked her so much that I coloured her in again, but swapped the colours of her clothes around


I didn't blend the colour in on her cheeks as much as I normally would - I wanted them to be a bit pink and indignant!  LOL

Here they are together...


Sorry they're not very good photos - it was really hard to get a decent photo today as the weather has been awful and the light was appalling (and I'm not that good at photography, LOL)

Supplies:
Digi Stamp - Jill is Two, Mo Manning; CopicsNestabilities Labels 4 dies, Antique Linen Distress Ink
White and Pink Cardstock;
Papers - So Cute and Play, Mary Mary collection - My Mind's Eye
Pink Grosgrain ribbon, Gems and Buttons, Martha Stewart Border Punch

More tomorrow, thanks for stopping by
Sue xx

Friday, 28 May 2010

Birthday's are better when you're a kid!

But oh my word they seemed so far apart!

Tonights layout is another one from my regular class and I think it uses some more of the Basic Grey Papers that I used to make the Going Dotty layout


This one is of my son at his birthday party last year, and he was spoilt rotten by friends and family alike :).

Sorry but it's a short one from me tonight as I've only just got home from taking the kids swimming.

More tomorrow

Sue xx

Thursday, 27 May 2010

No one quite like you!

Tonight I'm sharing another layout made in the bi-weekly class at Scrapbook Sisters

I found these Dream Street Papers quite a challenge, but I like how it turned out :)  As you can see each class is totally different from the last - I honestly don't know how Karen and Julie manage to do them alongside all of the other classes they teach!


I am very excited today as a few more bits and pieces have turned up, including a rather fab new Nikki stamp and a Ruby Fairy one which I got from Funky Farm Scrapbook Barn, and i'm itching to play with them later :-) but have to tidy up my table before I start as I have made rather a mess in the last couple of days and now only have a 6 inch square bit of desk remaining... oops :-). 

I'm hoping to be able to spend a bit of time crafting over the long weekend too, but have a sneeking feeling HB is going to want to spend most of it in the garage on his project car... I can feel a compromise coming on! 

Thanks for looking

Sue xx


Wednesday, 26 May 2010

Preparation...

...is the key, or so I've been told! 

Tonight's layout is another of the photos of my SIL's wedding photo's.  I think her wedding proved the point, she knew exactly what she wanted and what she didn't, what was important (their day, and their commitment to each other) and what wasn't (that the snow meant that a few guests couldn't make it), and the day was planed without being contrite or false.

 That said I was the one on the receiving end of the "I think I need a wrap, can you make one?" phone call at wedding day -36 hours, so maybe even the best laid plans are open to last minute adjustment - although I think if Id have said "no" it would have been fine, I just didn't dare and did as I was told :-)

I must credit the photographer Ken Peachey and his daughter for the stunning images, they have been an absolute joy to do layouts with :-)

Ken's daughter was with Nikki and I as we got ready, while Ken was with her husband and his family. 

Nothing was forced, we hardly noticed they were there (even when this photo was taken with her standing on a chair!) and it was lovely getting ready with an unbiased set of eyes offering encouragement!  My SIL and BIL chose a package that got them every image that was good enough of their day on disc, that they were free to copy and distribute as they wished - over 12 hours of photos, nearly 700 photos in all, not a moment was missed - much better than the standard package normally on offer, and although I don't know exactly how much it cost, I don't think it was much more than the standard 30 pics in an album cost of anyone else... Ken has put many of the images through photoshop (I assume) too, turning some black and white, sepia or cropping them to their best advantage as well as including the original image.  I can wholeheartedly recommend them if you know anyone looking for a wedding photographer in the South East.

Anyway, onto this layout...

This picture is of me, my HB and his sister in the last few minutes before the wedding, I'm still sorting out her dress, but I love the look that has been captured between my HB and his sister, :)


This LO was done in the my regular class at Scrapbook Sisters.  As usual my memory escapes me and I can't recall the name or manufacturer of the papers!!

 The black card stock is Bazzill and has been lifted off the paper with foam pads.  The stamp is Everyday Alphabet by Heidi Grace, and the heart border punch is by Fiskars.  Circle and circle scroll punch are from Woodware.


The scroll was also cut on the Cricut. and the flowers are varying sizes of retro flower punch by EK Success, edged with Charcoal chalk eye, with Black Diamond Stickles in the centre of each.

Hope you like this one as much as I do

Thanks for looking

Sue xx

Tuesday, 25 May 2010

So you

Well I've had a teensy spend up and have bought a few more of Mo's digi stamps that I am itching to print out and colour up and make into cards, until then another scrapbook layout, I'm hoping to be able to post last weeks class layout soon!

In the meantime, a page I did a while ago but seeing as my HB says that this page is one of his all time favourites, it only seems fitting to share it.

  It is a picture of my eldest son that was taken at when he was at nursery... how refreshingly different to have a school picture in black and white and with them not sitting in front of a blue background, smiling awkwardly :-)  Wish they were all like that - I didn't buy the latest set from school as they were awful and were so expensive - it just seems like so many school photographers don't care about getting a decent photo or putting the kids at ease, so I think the nursery lucked out with this one!

The journalling tells the story of the photo, how I forgot that it was photo day (some things never change) and didn't send a second set of clothes, or even dress him in his best that morning... and if you look closely you can see the remenants of his dinner on his t-shirt, and a mucky bit on his cheek which he wouldn't let them wipe off - a typical little boy!  But it is him aged 4 completely, sparkling eyes, cheeky grin, with a smudge of dirt on his cheek...


Supplies: Card - Bazzill, Paper - Sandilion, Chipboard elements coloured in Mica Magic ink

Thanks for looking

Sue
xx