Pages

background

Followers

Monday, 31 May 2010

Perfection = 1 Mug, 1 Sofa, 1 box of chocs, 1 Fluffy Dressing Gown

Thanks to the long weekend I've been able to play more than usual, and have been adding to the box of cards at a fairly rapid rate...

...why???? well....  I've decided to take the plunge and do a (very) local farmers market in the middle of the month - assuming they'll have me, and the cost of the stall isn't too much...

This is why I've been creating in batches of two's and upwards for a few weeks.  As some of you know for the last three years I've been selling my my cards at the school fete and giving them 100% of the takings.

I think that in the last year my designs have become more intricate, more complicated, and as such more expensive and time consuming for me to make, and making the 150 cards plus that I need to sell at the fete would just take too long seeing as it's in 3 weeks! (and yes, the thought that I knew it was coming up and should have started sooner has occurred to me!)

 In the last three years I have given the school around £1000 and taken not a bean.  While rewarding it was so disheartening at times - we were selling handmade cards for £1 and some people were still sniffy about it.  I couldn't figure it out - they had the opportunity to purchase a unique card for one pound, all of which went to support their child's school fund, yet still they would rather go to the card shop, tesco's or wherever and buy something mass produced and pay 2, 3 or 4 times the price... go figure :-).   So, as I say I'm starting small and doing the local market... now I live in a very small community so I'm not expecting a lot, but it's only for a few hours... if I sell anything I'll be happy :-) 

So this explains the mass production... please don't blame me for doing more than one of each design, I could blame my corporate training, but it's actually more to do with the fact that I don't actually like to give things away and want to keep one of each for myself :-)

 So anyway, enough drivel from me... onto today's card...


Putting pins on a card are a first for me, but I LOVE them!!!!  


I got a big packet of the plain pins from Dunelm Mill for £2.49 and the beads cost 99p each for a pack of 25/30.  I will admit to getting a bit carried away and buying some beads that were FAR to big for cardmaking, but in my defence they were very pretty :-)

Slobbing Nikki  has been coloured using Copics


The basic layout is from the Friday Sketchers Blog, which is a great source of inspiration.

Supplies:
Cardstock: White Linen Card - Papermill; Verde - Bazzill
Papers: Bo Bunny Mulberry Dot, Jazmyne Mist and Jazmyne Terrace
Punch: Martha Stewart
Flowers: Prima
Brads: Papermania
Stamps: Slobbing Nikki and Sentiment, Ladybug Crafts Ink
Pins and Beads - Dunelm Mill

Thanks for looking

Sue xx


Sunday, 30 May 2010

Playing with Acetate

Now I don't think I'm the only crafter in the world who has a pile of stuff they buy with good intentions then use a bit but don't really know what else to do with it!

So I read the article on using acetate in issue 16 of Creative Cardmaking with interest as I have loads of the stuff but seem to struggle to find new ways to use it!  One design particularly caught my eye so I've lifted it :)


It's much more effective IRL than my limited photography skills allow :-).

Basically there is an acetate panel in the middle of the front of the card and then there is a strip of cardstock stuck to the right hand edge.  I've neatened the back up by putting strips of card over the acetate.  The image is stuck onto the acetate with foam pads and I've stuck another plain label on the back to hide them.   The happy birthday sentiment is stamped on the back panel of the card.

Supplies: Bazzill Bling, Acetate, Bo Bunny Papers and Ribbon, Stamps - Winestool Nikki and Happy Birthday

I've also been playing with my new stamps, and as I had loads of paper left over from yesterdays Jill cards used them up to make cards with this image of Daydreaming Ruby


Isn't she cute!  I've used Glamour Dust on her wings to give her a bit of sparkle.  I can see her being used on quite a few cards soon!

Anyway, that's it from me today, I've got to go to the supermarket and then keep the washing machine loaded... I'm still ignoring the ironing!

Thanks for looking

Sue xx

Saturday, 29 May 2010

Introducing Jill...

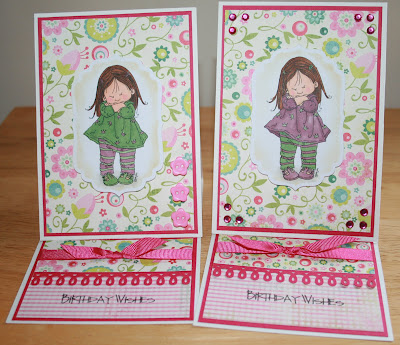
As I hoped I've had a little bit of me time today to play, so took the opportunity to use the "Jill is Two" image that I recently got from Mo Manning


Isn't she a sweetie?  I think anyone that has or knows a little girl has seen that expression more than once!  :-)

I liked her so much that I coloured her in again, but swapped the colours of her clothes around


I didn't blend the colour in on her cheeks as much as I normally would - I wanted them to be a bit pink and indignant!  LOL

Here they are together...


Sorry they're not very good photos - it was really hard to get a decent photo today as the weather has been awful and the light was appalling (and I'm not that good at photography, LOL)

Supplies:
Digi Stamp - Jill is Two, Mo Manning; CopicsNestabilities Labels 4 dies, Antique Linen Distress Ink
White and Pink Cardstock;
Papers - So Cute and Play, Mary Mary collection - My Mind's Eye
Pink Grosgrain ribbon, Gems and Buttons, Martha Stewart Border Punch

More tomorrow, thanks for stopping by
Sue xx

Friday, 28 May 2010

Birthday's are better when you're a kid!

But oh my word they seemed so far apart!

Tonights layout is another one from my regular class and I think it uses some more of the Basic Grey Papers that I used to make the Going Dotty layout


This one is of my son at his birthday party last year, and he was spoilt rotten by friends and family alike :).

Sorry but it's a short one from me tonight as I've only just got home from taking the kids swimming.

More tomorrow

Sue xx

Thursday, 27 May 2010

No one quite like you!

Tonight I'm sharing another layout made in the bi-weekly class at Scrapbook Sisters

I found these Dream Street Papers quite a challenge, but I like how it turned out :)  As you can see each class is totally different from the last - I honestly don't know how Karen and Julie manage to do them alongside all of the other classes they teach!


I am very excited today as a few more bits and pieces have turned up, including a rather fab new Nikki stamp and a Ruby Fairy one which I got from Funky Farm Scrapbook Barn, and i'm itching to play with them later :-) but have to tidy up my table before I start as I have made rather a mess in the last couple of days and now only have a 6 inch square bit of desk remaining... oops :-). 

I'm hoping to be able to spend a bit of time crafting over the long weekend too, but have a sneeking feeling HB is going to want to spend most of it in the garage on his project car... I can feel a compromise coming on! 

Thanks for looking

Sue xx


Wednesday, 26 May 2010

Preparation...

...is the key, or so I've been told! 

Tonight's layout is another of the photos of my SIL's wedding photo's.  I think her wedding proved the point, she knew exactly what she wanted and what she didn't, what was important (their day, and their commitment to each other) and what wasn't (that the snow meant that a few guests couldn't make it), and the day was planed without being contrite or false.

 That said I was the one on the receiving end of the "I think I need a wrap, can you make one?" phone call at wedding day -36 hours, so maybe even the best laid plans are open to last minute adjustment - although I think if Id have said "no" it would have been fine, I just didn't dare and did as I was told :-)

I must credit the photographer Ken Peachey and his daughter for the stunning images, they have been an absolute joy to do layouts with :-)

Ken's daughter was with Nikki and I as we got ready, while Ken was with her husband and his family. 

Nothing was forced, we hardly noticed they were there (even when this photo was taken with her standing on a chair!) and it was lovely getting ready with an unbiased set of eyes offering encouragement!  My SIL and BIL chose a package that got them every image that was good enough of their day on disc, that they were free to copy and distribute as they wished - over 12 hours of photos, nearly 700 photos in all, not a moment was missed - much better than the standard package normally on offer, and although I don't know exactly how much it cost, I don't think it was much more than the standard 30 pics in an album cost of anyone else... Ken has put many of the images through photoshop (I assume) too, turning some black and white, sepia or cropping them to their best advantage as well as including the original image.  I can wholeheartedly recommend them if you know anyone looking for a wedding photographer in the South East.

Anyway, onto this layout...

This picture is of me, my HB and his sister in the last few minutes before the wedding, I'm still sorting out her dress, but I love the look that has been captured between my HB and his sister, :)


This LO was done in the my regular class at Scrapbook Sisters.  As usual my memory escapes me and I can't recall the name or manufacturer of the papers!!

 The black card stock is Bazzill and has been lifted off the paper with foam pads.  The stamp is Everyday Alphabet by Heidi Grace, and the heart border punch is by Fiskars.  Circle and circle scroll punch are from Woodware.


The scroll was also cut on the Cricut. and the flowers are varying sizes of retro flower punch by EK Success, edged with Charcoal chalk eye, with Black Diamond Stickles in the centre of each.

Hope you like this one as much as I do

Thanks for looking

Sue xx

Tuesday, 25 May 2010

So you

Well I've had a teensy spend up and have bought a few more of Mo's digi stamps that I am itching to print out and colour up and make into cards, until then another scrapbook layout, I'm hoping to be able to post last weeks class layout soon!

In the meantime, a page I did a while ago but seeing as my HB says that this page is one of his all time favourites, it only seems fitting to share it.

  It is a picture of my eldest son that was taken at when he was at nursery... how refreshingly different to have a school picture in black and white and with them not sitting in front of a blue background, smiling awkwardly :-)  Wish they were all like that - I didn't buy the latest set from school as they were awful and were so expensive - it just seems like so many school photographers don't care about getting a decent photo or putting the kids at ease, so I think the nursery lucked out with this one!

The journalling tells the story of the photo, how I forgot that it was photo day (some things never change) and didn't send a second set of clothes, or even dress him in his best that morning... and if you look closely you can see the remenants of his dinner on his t-shirt, and a mucky bit on his cheek which he wouldn't let them wipe off - a typical little boy!  But it is him aged 4 completely, sparkling eyes, cheeky grin, with a smudge of dirt on his cheek...


Supplies: Card - Bazzill, Paper - Sandilion, Chipboard elements coloured in Mica Magic ink

Thanks for looking

Sue
xx

Monday, 24 May 2010

Happy Birthday Dad!

It's my Dad's 80th birthday today!!  Happy Birthday Dad!

As they've gone away for a couple of days I went and saw him on Saturday to give him his card.  Now my Mum is a stickler for not opening cards before your actual birthday (it's the same at Christmas!) but my Dad wanted to open it there and then - I agreed with him as I wanted to see him open it too, as I was pretty pleased with how this one turned out.  Arguement settled, and the card was opened :-)  What is it that they say about parents and children swapping roles as you all get older?  Tee hee!!

He was really pleased with it, and has taken it away with him (and all the rest of the cards that he isn't allowed to open yet :-) )

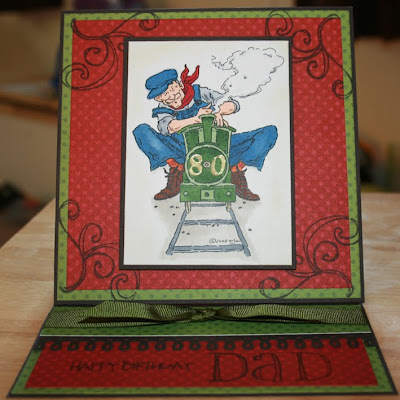
I made this at the Scrapbook Sisters Scrap Attack on Friday evening and it's another easel card - they still have the wow factor for me at the moment.  I would have liked to have used a different border punch on this one, but I've only got 2 and this is the least frilly of the two.  I'm definately going to get some more as they are so versatile on both scrapbook layouts and cards.

The image is a digi stamp called The Engineer by Mo Manning, I love how her images colour up, so am going to be ordering some more in the next couple of days.

Anyway, enough rambling!  Here's the card and some close ups


The 80 stuck to the front of the train is cut out of Gold Mirri Card using the Cricut. I Love this image it is SOOO my Dad - yes, he even has a hat like this one :)  He's mounted on foam pads for a bit of interest and the scroll stamp behind the image was one of the 99p ones I got from Scrapbook Sisters a while ago


Supplies:
Images/Stamps: The Engineer digi stamp by Mo Manning, coloured with Copics; Sentiment - Ladybug Crafts Ink, Be Yourself Alphabet - Dawn Houser/Inkadinadoo, Scroll - Rhonna Farrer/Autumn Leaves
Papers/Card: Brown Bazzill, Gold Mirri, Wild Berry Red And Clover Dot Bo Bunny papers, all from Scrapbook Sisters; 
Inks: Antique Linen Distress ink, Timber Brown Stazon; Tuxedo Black Momento
Other: Border punch - Martha Stewart; Green Grosgrain ribbon - C&H fabrics

Special thanks go to master Cricut operative, Julie from Scrapbook Sisters, for being brave and cutting the 80 out for me - it would have gone all wonky if it had been me doing it! :)

Thanks for looking

Sue xx

Sunday, 23 May 2010

Its hot and sunny, so I've made a Christmas card, obviously...

Well it's not as silly as it sounds!  Well not really! 

I've done this card for the Sweet Sunday Sketch Challenge.  I looked at the sketch this week and I remembered I'd got some K&Co Snowflakes at the bottom of my embelishment box, a quick rumage through my papers produced some Christmas Paper by Adornit, which I ran through the Cuttlebug using my Ice Crystals embossing folder after stamping with some stamps bought at Lakeland a couple of years ago. 

Amazing, it came together really easily and it's a really pretty card.  I'll be using this design again (I'm thinking the looming school fete...).  And I make no apologies for having done a Christmas card in May, if I can do one a week from now til Chrismas I might just get enough done!

So the sketch looked like this


And my interpretation


Thanks for looking

Sue
xx

Watch out for bears!

Hi, hope you've had a good weekend!  The weather has been gorgeous here, I've no idea how hot it got here but its nice to be able to open the windows and let the outside in for a change!

I live in a little hamlet of four houses overlooking a valley and I've been watching the fields of wheat change colour this week - they started the week as a really deep green and during the last week the colour change has been amazing, through emerald, and now lighter still.  All the trees are now in leaf and the red one - don't ask me what sort it is, its a red tree to me, that's as good as it gets :-) - looks amazing.  It really feels like summer is on its way at long last :-).

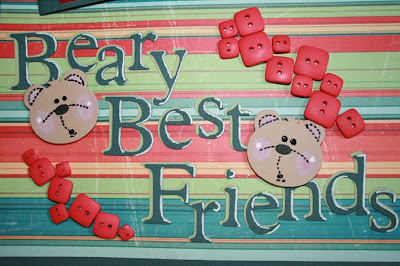
Anyway today's pictures are of a layout I did a couple of years ago of my son and his teddies.  Behind the main photo is a mini book with the story of each teddy, and some more photos of them all.  For this photoshoot they all got dressed up in their PJ's (yes the teddies have PJ's) and I snapped away :-)


The teddies have individual portraits, and I have added their names to the photos with rub ons


The letters were cut on the cricut and then shadowed with a lighter shade of cardstock. 

Supplies: Cardstock - Bazzill; Paper - Cosmo Cricket "Cogsmo Bandwidth"; Red buttons from Stash; Die Cut Bears - Sizzix?? coloured with chalks; Rub On's - American Crafts

I'm going back out to do a bit more in the garden, enjoy the rest of the weekend

Sue xx

Saturday, 22 May 2010

Elegance in Black

Tonights layout is something I'd never tried before, but I had this idea and I think it kind of worked.

My idea was to see what a layout would look like if you only used one colour - and I chose Black!  Eek!!  Now as with all colours, there are so many different shades of black and this layout uses different textures all over it to keep the interest, without feeling too grungy. 


The picture is one of me that was taken at my SIL's wedding last year, and I actually like this page of me (normally I cringe at the thought of me on a page!)

The title is kinda ironic, as I'm usually running all over the place at 100 miles an hour so elegance usually gets left behind, but that day in me posh frock I did feel good :-)

Supplies - Cardstock - Black Bazzill Basics and Bling; Black Doodlebug Sugar Coated Cardstock; Black Gems (from stash) placed using Bazzill template; Chipboard Letters - Thickers; Black Tulle ribbon
all supplies from Scrapbook Sisters

Thanks for looking

Sue
xx

Phew!

Too phew's actually!!

Firstly, my collegue loved the card that I posted yesterday (what a relief!), and proceeded to show it to everyone who walked into her office - LOL nothing like a bit of free publicity :-)

Secondly, how lovely is the weather today???  Hope it stays like this for a while :-).  I'll be posting a scrapbook page later on but gotta get going with a few jobs before then

Sue
xx

Friday, 21 May 2010

Oops, nearly forgot :-)

So there I am packing up my stuff for tonight's crop at Scrapbook Sisters when I suddenly realised that I had said I would make a card for a work colleague who needed something quick for a wedding this Saturday!!!  I've been so busy this week doing other things that I completely forgot!!!! 

So I had to get some stuff back out again and get cracking!!  Thankfully I had already discussed the design with her so fingers crossed she likes it :-).

Fortunately I know the bride too and know she's planned her wedding to be small, intimate, classy and elegant, and that she would prefer this sort of design to something overly sentimental or slushy (thank goodness or I'd probably still be making it...)

Her colours are deep purple and white, and I had some beautiful purple satin Berisford ribbon in my ribbon box that looks really luxurious.

The diamante buckle are from the few that I had left over from my SIL's wedding invitations, and the Bo Bunny rub on sentiment is perfect for her and her HB to be - plus I have no idea where my "On Your Wedding Day" Stamp has got to! :-).

Underneath the white card is some purple Bazzill bling.


I jokingly call this design my "Boutique Range" and it appears in many guises throughout the year - in various colours, Christmas, engagements, wedding cards and acceptances, anniversary, birthday - it seems to be one of those designs that is really adaptable to pretty much any occasion when you need a classy card, the border stamp changes depending on the theme of the card, tulle and ribbon make guest appearances, and the diamante and bows and knots take turns too :-)
 
One addition to this card that I haven't done before is to make a additional score at the top of the back of the card, and stuck this to the front with double sided tape - this was something Gayle Bond showed me to do, and what a clever trick it is too, as it stops this type of card from sliding flat, I hope it works on this one as its quite front heavy!   I'm not sure if I described what I've done there very well, so as a picture describes a thousand words...


Thanks for looking

Sue
xx

Thursday, 20 May 2010

T is for...

...Tractor!!!

Quick post tonight, and this is one that I found while looking through my albums and is of my eldest son.   The picture was taken when he was about 3 when his granddad took him to an agricultural fair at the local showground.  This was one of the first layouts I ever did and the design was taken from a sketch on Page Maps, and I think demonstrates you don't aways need fancy stamps and punches to create something special.

I think the papers are Camping collection by Sandilion, Cardstock - Bazzill; chipboard letter - Basic Grey, ribbon from stash, words cut using Cricut.  The orange card is a flap that lifts up to reveal hidden journalling


And my favourite bit? 


... it has to be the tractor tyre tread - created by putting brown acrylic paint on the wheel of my son's toy tractor and then driving it over the orange cardstock.  I seem to remember it took me a couple of goes and both me and the tractor got covered in brown paint :) IRL there are thin bits of paint and lumpy bits, which you can only just about see in the picture...

...this one got me thinking, if I wanted to do a tyre print now I'd have probably shopped around for a stamp,  3 years ago I raided my child's toy box, and I think I got a better result because of that. 

So this weekend I'm gonna be looking at everyday things and see if I can use them in place of stuff I would only use very occasionally, leaving my craft budget free for more Copics!  I'll let you know how I get on :)

Thanks for stopping by

Sue xx

Wednesday, 19 May 2010

St Mark's Square

I went to my regular class last night at Scrapbook Sisters and had a great time as always, loads of laughter, and (for a change) quite a bit of work got done.  I was so inspired that I came home and finished the layout I was working on!  I wish I could show you what I did, but as the classes are running for the next two weeks I can't as I don't want to spoil it for anyone else that hasn't done their class yet :-).

I'm hoping to do another layout (or two) tonight if I can, but I should be making the cards that I must do (birthday, thank you, wedding...).

Anyway, tonight's layout is one I did from the remnants of a previous class.  I thought they went well with these photos as there is a kind of faded grandeur to them that so reminded me of Venice, where I went while on a trip to Italy... I took these photos while on a school trip about 20 years ago, sometimes I think it's good to dip back into old photos of times you enjoyed


I've still got loads from this kit left so plan to so some more of the photos I found from the trip, one layout at a time!

I wanted to use flowers on this layout, but nothing I had was the right colour, so I used white ones and coloured them up with a chalk eye ink pad.


The colour of the pink is a lot more subtle IRL!  The centre of the flowers is cut using a Woodware Flower punch, with more little pearls in the middle

Supplies: K&Co (I think!) papers, Brown Bazzill, Prima Flowers, Woodware Punch, Pearls, Basic Grey journal stamp, Inkadinkadoo "Twighlight Garden" alphabet stamps

More tomorrow, thanks for stopping by

Sue
xx

Tuesday, 18 May 2010

Always

Sometimes life don't turn out how you expected and I suppose in a funny sort of way the reason behind this layout is why I started scrapping (and cardmaking) in the first place, through which I have met so many fabulous and extremely talented new friends.

I'm not going to explain much about this layout, if you know me well you know the story, if you don't then I hope you're not offended if I don't go into detail :)


The papers are by Bo Bunny all from the Abbey Road range - Stripe, Truffle, Vine and Abbey Road; Cardstock - Bazzill, Journalling Block Stamp - Basic Grey; Chipboard - Thickers; Rub Ons - ???

Thanks for stopping by

Sue xx

Monday, 17 May 2010

Sweet Sunday Sketch Challenge 69 - Part 2


As I said in my last post I wasn't entirely happy with the card that I originally did for this weeks Sweet Sunday Sketch Challenge, even though I loved the image and the paper and the ribbon in their own right as a combo they just didn't look right... so take two... or more accurately, two, three and four :)  Before I knew it I had a flock :)


Aren't they cute???  I guess it goes to show that not every sketch works with every bit of paper!  I think these look much better :)

So some close ups...

I think is the little guy I'm going to enter for the challenge now - I did toy with the idea of changing the you for ewe, but didn't in the end, who knows another incarnation of this stamp might have that as a sentiment :)


Version 2


Version 3


And a close up of Shaun, just cos he's a cutie :)


Supplies: Papers - My Mind's Eye Bloom & Grow 6x6; Gems from stash; "Shaun" is actually "Ewe" by Penny Black, coloured with Copics, and glittered with Glamour Dust

So what became of last nights card?  Well I was thinking about it today at work - I probably should have been thinking about work, so shhh, if anyone asks I was thinking about it in my break :) - and decided the ribbon had to go... I think this paper is so patterned it didn't need it... it now looks like this


Better?  I think so...

Thanks for looking

Sue xx


Sunday, 16 May 2010

Sweet Sunday Sketch Challenge 69 - Part 1

Today I thought I'd make the most of the peace and quiet while I could and get creative!  I don't know why but it just wasn't happening!!  How very irritating :)

I did manage to do a few cards though, including a couple from today's Sweet Sunday Sketch Challenge.  Now I don't know why but I found this one really tough, whereas the last with the last two inspiration hit me straight away... maybe that's the point it pushes you outside your comfort zone a bit, otherwise it wouldn't be called a challenge, it'd be called an easy!! :). 

I like the cards I did with this sketch, one of which is below, but I'm not entirely sure that the ribbon is right, so think I may tinker with it a bit more until I'm happy.  The original sketch looked like this...


Now I don't have a circle nestability die so after a few disastrous attempts using the Cricut to cut a circle big enough - I MUST remember to order a new cutting mat !!! - I gave in and used the label die that I do have.  I figured well, it's a sketch, its inspiration not an exact science... right???  That also excuses me doing a square card :)

Anyway, this is what I came up with


See what I mean about the ribbon???  hmmm...  Loving this image though, so here's a close up

She's great isn't she?  She's Checking Facebook by Mo Manning and was the freebie she did for a while - I love her slippers!!  If you've not seen Mo's work before have a look at her site, you'll be there ages as she has so many gorgeous images to download and most are only $3, roughly £2, and you get your image straight away, no waiting for Mr. Postie!!  I have my eye on a few to be purchased next payday :)

She's coloured using a whole host of Copics from my ever growing collection - C-3, C-5, E00, E04, E37, E47, E53, E57, G99, R20, V91, V95, YG95, W-1

I''ll share the second attempt tomorrow :)

Thanks for stopping by

Sue
xx